Installing a window air conditioner correctly is crucial for optimal performance and efficiency. While window AC units are generally easier and quicker to install compared to split AC systems, it’s essential to approach the installation process with care and attention to detail. A properly installed window AC ensures a cool and comfortable environment and helps save energy and reduce utility costs. This guide will walk you through the five essential steps to master window AC installation, allowing you to enjoy the benefits of a correctly installed unit. So, let’s delve into how to install window AC correctly and create a cool oasis in your home in India.
Table of Contents
Tools Checklist for a Hassle-free Installation

Before beginning your window AC installation, you must gather all the necessary tools to ensure a smooth and successful experience. Here’s a comprehensive checklist of everything you’ll require:
- Screws: First and foremost, having 6-8 screws are essential for securing the AC unit firmly in place.
- Screwdriver: A screwdriver the same size as the screws can easily tighten and adjust them.
- Plywood: Plywood may provide extra support but it isn’t always mandatory.
- Hammer & Nails: A hammer and nails can be advantageous if additional frame reinforcement is required.
- Measuring Tape: Lastly, ensure you have a measuring tape handy to procure accurate dimensions for an appropriate fit.
And let’s not forget to bring along some muscle power, too, because lifting and manoeuvring the AC unit will necessitate some strength! By completing this checklist of tools, you’ll be more than equipped to handle your window AC installation with absolute ease.
Now that we’ve completed the necessary tools and their uses, we can move on to the subsequent steps.
Step 1: Accurate Measurements

Accurate measurements are crucial when it comes to installing a window AC unit in India. Taking precise measurements ensures a stable and secure installation, preventing potential hazards during operation. To measure the window accurately, start by measuring the height and width of the AC unit itself. Additionally, measure the dimensions of the window opening, noting any variations in size.
Following these guidelines and taking precise measurements will help you achieve a proper fit for your window AC, ensuring efficient cooling and peace of mind.
Step 2: Preparing & Constructing the Frame for Window AC Installation

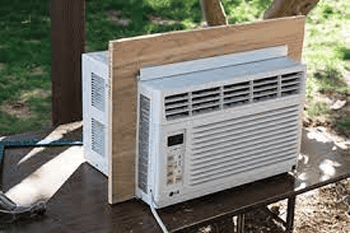
The next step in your window AC installation process is preparing the frame. Before doing so, thoroughly assess the condition of your window frame to ensure that it’s robust and meets proper guidelines for installation. If any repairs or cleaning are necessary, take care of them first to save time and ensure a smooth installation process. Constructing an appropriate frame with plywood that fits the dimensions of your AC unit is essential for its longevity and safety.
Reinforcing your window frame helps create a more robust foundation adding extra support to maintain a safe and secure fitting for use in your home or office.
Step 3: Fitting the AC Cabinet In The Frame

Once you have prepared the frame, it’s time to fit the AC cabinet. Begin by familiarising yourself with the design and specifications of the AC unit’s cabinet. This understanding will aid you in aligning the cabinet correctly with the window frame. Remember to install the cabinet with a slight slope towards the outside, allowing condensed water to drain outside due to gravity. This step ensures proper water management and prevents any potential water damage. To secure the cabinet onto the frame, carefully screw it down, ensuring a tight and secure fit.
Attention to these details can prevent air leaks and create an efficient and reliable window AC installation.
Step 4: Placing the Window AC into the Cabinet

In step 4 of the window AC installation process, it’s time to place the AC unit into the cabinet. Approach this task with caution, ensuring the safe and careful lifting of the AC unit into position. Slowly and steadily lower the unit into the cabinet, not damaging any components or the surrounding area. Once the AC unit is properly positioned, connect it to the power source, following the manufacturer’s instructions. Afterwards, attach the front cover and filter to complete the installation.
Verifying the unit’s stability and functionality is crucial, ensuring it is securely in place and operational. By following these steps diligently, you can enjoy the cooling benefits of your newly installed window AC unit.
Step 5: Weatherproofing and Insulation

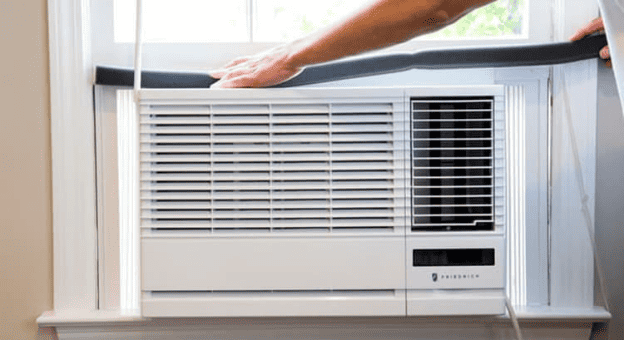
In the final step of mastering window AC installation, it’s time to focus on waterproofing and insulation. It’s important to seal any gaps and cracks around the AC unit to ensure optimal cooling efficiency. Begin using foam to close any openings and holes, effectively sealing them. This step prevents dust and insects from entering the room and helps maintain a controlled indoor environment. Additionally, consider installing weatherstripping, such as Foam Insulation Tape, to create a secure seal from the outside. This added insulation helps prevent air leakage, enhancing energy efficiency and reducing cooling costs.
Weatherproofing and insulating your window AC installation can minimise moisture buildup, improve performance, and create a comfortable and efficient cooling environment.
Also Read
- How to Choose Between 1 Ton and 1.5 Ton AC?
- What is the Power Consumption of AC in 1 Hour?
- Comparing Windows AC Vs Split AC: How to Choose the Right One for Your Home?
The Bottom Line
In summary, mastering the installation of a window AC unit requires following five essential steps detailed in this guide. These steps involve taking accurate measurements, preparing the frame, fitting the AC cabinet, placing the AC unit into the cabinet, and weatherproofing with proper insulation. By following these guidelines meticulously, you can enjoy an optimal cooling performance from your window AC unit and reap its benefits in a cool and comfortable living or working space. Please comment below if you require further assistance or have questions about installing a window AC.
FAQs
Do I need any special tools for window AC installation?
While specialised tools are not required, you’ll need a few essential tools for a successful installation. These include screws, screwdrivers, plywood (optional), a hammer, nails, and a measuring tape. Having these tools on hand will help streamline the installation process.
How important is accurate measurement for window AC installation?
Accurate measurement is crucial for a proper fit and stable window AC unit installation. Make sure to measure both the dimensions of the AC unit itself and the window opening. These measurements determine how well the unit fits and functions in the designated space.
Can I install a window AC without a frame?
While it’s possible to install a window AC without a frame, it is highly recommended to use a frame for added support and stability. A structure helps distribute the weight of the AC unit evenly and reduces the risk of damage to the window or the unit itself. For further details, refer to the post mentioned above.
How do I prevent air leaks around the window AC?
It is essential to seal any gaps or cracks around the AC unit to prevent air leaks. Foam insulation or weatherstripping can seal these areas effectively, keeping the conditioned air inside and preventing outside air from entering. Proper weatherproofing ensures efficient cooling and energy savings.


